I was lucky enough to be given a copy of the Zu3D animation kit following their kind sponsorship of the last TeachMeet Clevedon. Since then I’ve had a number of opportunities to familiarise myself with it and the digital leaders at the school are enjoying getting to grips with it too. I thought I’d share what I’ve found out and how I think it could be used. It’s a great piece of kit.
What do you get?
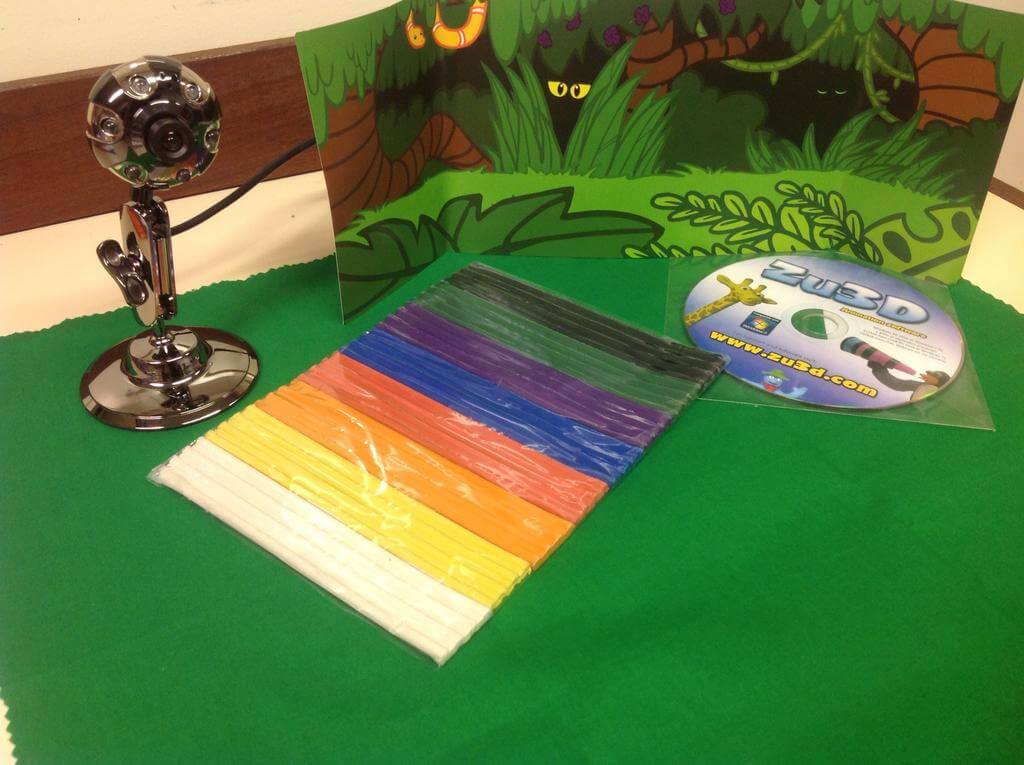
In the pack was everything you need to get yourself up and running. You get a green screen, a HD webcam, some plasticine and their animation software.
What’s it like?
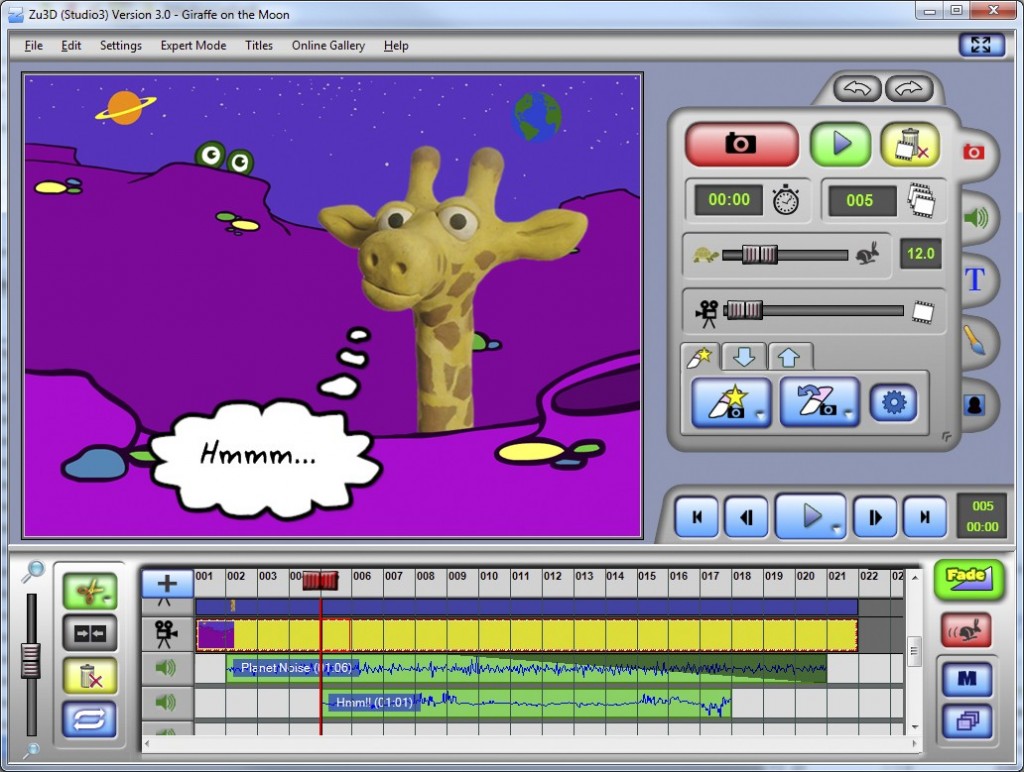
With my background being Secondary schools, I think for students at our level the UI is a little bit clunky in terms of how it looks compared to some of the more slick looking software available in the market. That can be excused though because I suspect that the majority of their target market will be the Primary sector and the interface is so simple and easy to use, with bright colours and recognisable icons for younger students, it works well. I’d like to give my 3 year old a go on it and see what he makes of it. I think he would get right in to it. All of that said too, what it may lack in looks to attract an older audience, it certainly doesn’t lack in power. I was blown away at how quickly the automatic chroma-keying worked. It was amazing. The software is simply jam-packed full of features too: onion skinning between frames, easily import your own audio/backgrounds (it comes with some nice animated gifs too), titles/credits, narration options, drawing on frames, adjustable frame rates, eraser tool to remove rigging e.g. for flying objects, multiple video tracks, multiple export options (although if it hasn’t got the one you want, you can easily convert it using a free tool such as Format Factory), drawing straight on to frames to make your own animations, the list goes on – it’s really very powerful. The HD webcam is a great piece of kit too with a nice little adjustable stand. It all installed nice and easily. Since getting the software and familiarising myself with it, I have to admit, when using my PC I have been doing quick video editing in it because it’s simply so quick and easy to use. Other programs such as Premiere Pro etc are awesome, but they’re so heavy in comparison, for knocking something together that’s quick and easy, this tool is spot on.
How can you use it?
Using green screening and animation is a great way of engaging students in lots of different learning activities. For example, students can use the kit to bring a story to life, so rather than just writing their story, they’re writing it for a purpose – they’re going to turn it in to a film. It’s another way too that students can demonstrate understanding, share ideas in interesting and innovative ways and more. Not only could you use it for some great animation work but it can also act as your go to app on your PCs for editing movies, putting together clips you’ve shot using your Flip Cams or whatever camera, add titles, so forth and so on. I think that perhaps, because the way the interface looks, it might be more of a tool of choice for teachers in a Primary setting although given its power it could actually be equally at home in a Secondary setting, particularly given its ease of use.
Check out some of their example videos here for some more ideas and examples of how schools have been using the software: http://www.zu3d.com/gallery
Summary
A powerful tool for video editing and creating animation sequences, especially in stop frame animations. It’s loaded with features and given its price; it’s a cracking piece of kit. Do you need the full animation kit? Probably not, but it’s certainly great fun, particularly in a Primary setting. If you’re Secondary, like me, it would be a brilliant tool for students to use at KS3 and probably at KS4 too; although if you’ve got some higher end kit available such as Final Cut or Adobe Premiere / After Effects etc, by KS4 you will probably be wanting students to learn how to use that. That said, if you’re a teacher of a subject other than ICT, which many people are (!) it’s a tidy tool that students can use quickly and easily to create some cracking video sequences. I should say too, if you don’t want the full animation kit, you can just get the software by itself – school pricing can be found for the individual software here: http://zu3d.com/shop/zu3d_studio3.
For more info visit http://zu3d.com


